Main menu
Everyone Rides Teacher-Led Resources

The Everyone Rides Teacher-led program was developed to address the need for cycling safety education in smaller communities across British Columbia’s vast geography.
The goal is to train teachers to deliver this 5 unit cycling safety and skills-building program. We hope you and your students enjoy reaching our 3 goals:
- Increase bike riding confidence
- Learn about the rules of the road to stay safe while biking
- Have fun!
Overview of Everyone Rides Teacher-led Program

Once your community is chosen for the Teacher-Led Everyone Rides program, follow these steps:
1: Sign up for Learn2Ride Online
Teacher registration instructions for Learn2Ride Online can be found here.

2: View HUB Teacher Training Video & Attend online Q & A session
Watch the 20-minute HUB Cycling training video here. HUB coordinators will schedule a video call Q & A session to answer any questions you may have.
3: Recruit Volunteers & Communicate with Families
Find volunteers to help with the on-bike units & send a letter home to parents/guardians about the program.
- Volunteer job description (send out 2 weeks before program)
- Family Letter (send out 2 weeks before program)
- If school is doing a photo shoot, please send this Photo/Video Release Form to parents/guardians
4: Teach In-class Bike Safety Unit
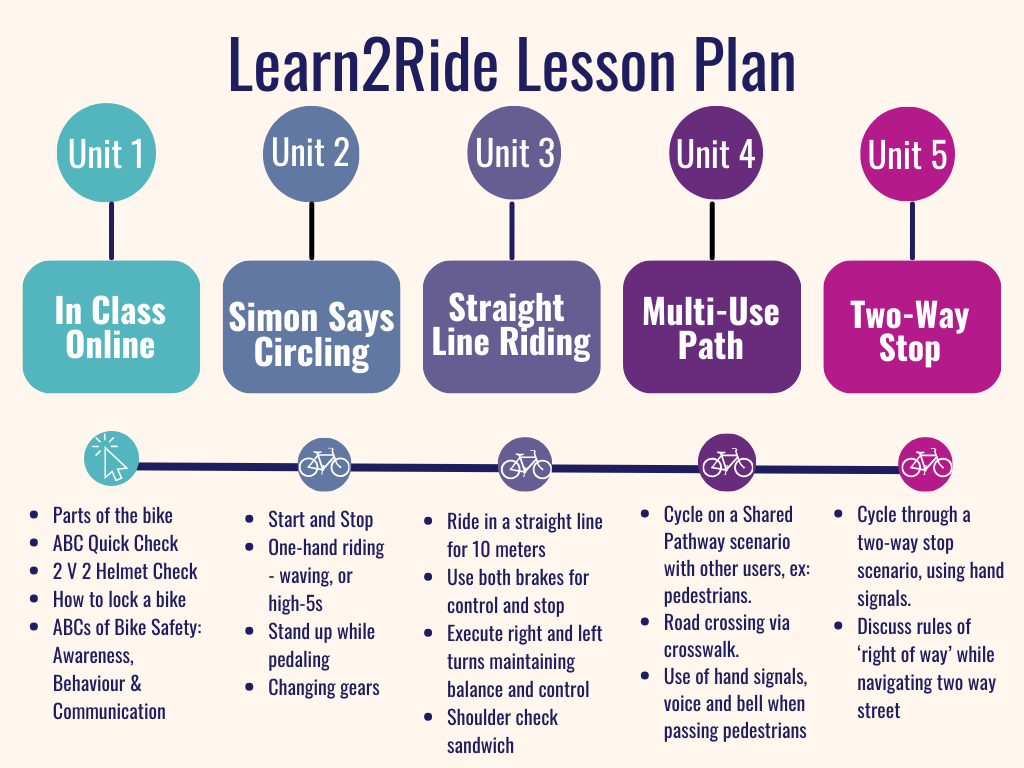
Use the Learn2Ride Online account you created in Step 1 to access the course and guide students through parts of the bicycle, ABC Quick Check, locking a bike, Helmet and Safety Gear, and ABC of bike safety. To log back in after you have created a username, go to https://education.bikehub.
5: Trailer Arrives at Your School. Familiarize Yourself with Bikes & Gear.
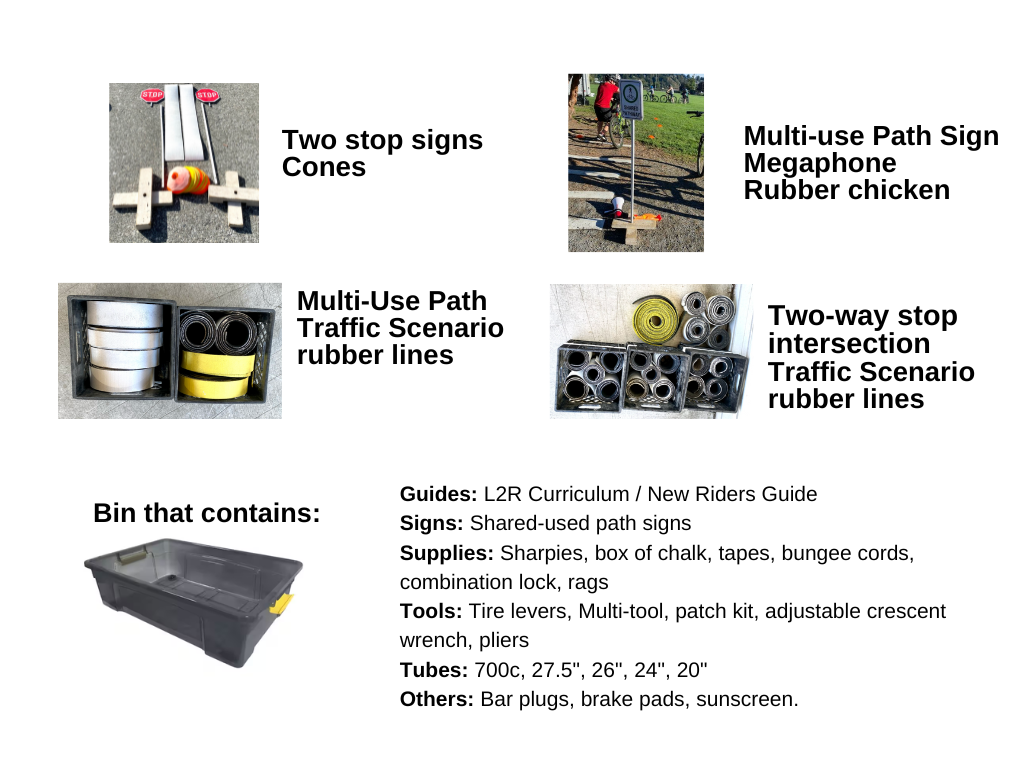
School District Maintenance staff deliver the trailer & you have it for about a week. Contact your School District organizer for the pickup/drop-off schedule. You now have access to a trailer that includes a class set of bikes, helmets, & other equipment needed to teach all the on-bike lessons. We recommend taking the Everyone Rides certificates for all participating students while you are previewing the trailer before you start the on-bike lessons.


21-34 bikes in a range of sizes
35+ helmets in a range of sizes
Traffic Scenario Kits:

6: Teach On-bike Units 2-5
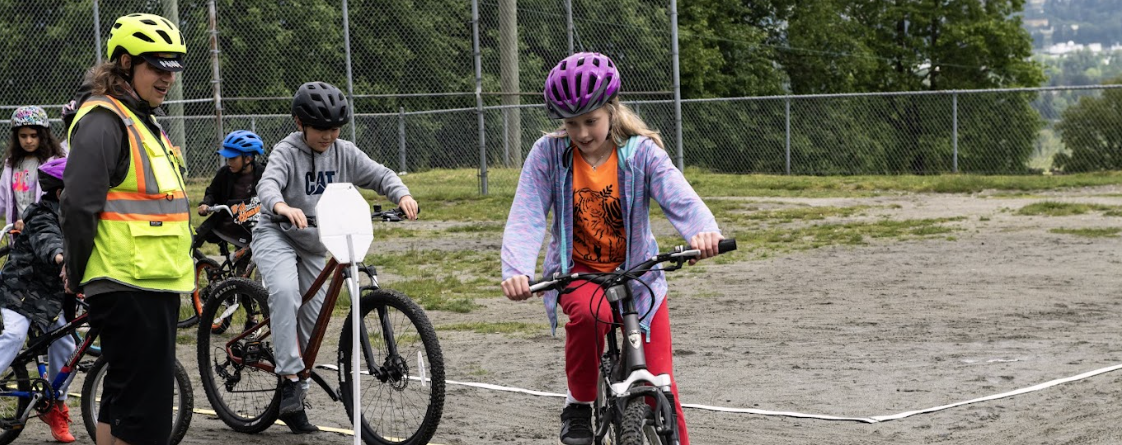
Each participating class will do lessons on the school grounds with their teacher & Everyone Rides volunteers. The on-bike program is designed in four units, delivered over four 60-80-minute lessons in one week. These resources may be helpful for your lessons:
7: Communicate Any Gear Issues to HUB Cycling
If you have any gear issues (flat tires, broken equipment, etc.) teachers can communicate the bike number and issue via the Gear Issues form so that HUB staff can help coordinate repair as soon as possible.

8: Complete Post-Course Surveys
Once you’ve completed the course, please fill out the below surveys to help us improve future courses. Your feedback is greatly appreciated!
- Teacher Post Program Survey
- Family Survey link (also located on the Take home Certificate)
Videos
These short training videos of On-bike Units are meant to supplement your teaching guides and show Learn2Ride in action. You can view them below or on YouTube.
Getting Started:
This video shows how to prepare for an on-bike training session on school grounds, and what to look for in terms of best surfaces, where to park the vehicle, and how to organize the bikes and helmets.
This video reviews how to fit a helmet, and the ABC’s for safety checks of your bike. These include checking your helmet for proper fit, and checking your bike for air, brakes, chain, and quick releases.
This video shows how to set up for each station.
Stations:
This video shows a bike skills training activity using a "Simon Says" game within a cone circle.
This video describes a bike skills training station focused on balance and control. It reviews starting stopping, signals, shoulder checking and the “Signal Sandwich”.
This video outlines a cycling training station designed to teach students safe and respectful multi-use path and road riding.
This video details a cycling training station for navigating a two-way stop intersection. Students practice turns, hand signals, shoulder checks, and right-of-way rules.
